For the creation of the Christmas mood in new holy even more important is the Svyatkov atmosphere in this house. Help to tune in to the new motif of shoes and help to decorate your donkey differently. Miraculous tinsel, garlands, candles and other trinkets will play this role. But what about handicraft amateurs? You yourself don’t sit on the mіsts, even if the winter is holy, they are a majestic space for ideas and virobs, wrought with your own hands. Our master-class will look at options for the ideas of the Christmas yalinka-beautiful paper. Yak fight volume yalinka from paper independently in household minds? You know, having read the master class from the photo and diagrams.
Ways for vikonanny are already rich, so we need:
- Papir (deposit in the way);
- Olivets;
- Line;
- Glue;
- stapler;
- Knives;
- Some models have compasses.
Model No. 1 - Yalinka volume of paper
For the cob, we work the base at the look of the cone. If you are planning to work even more, then the scheme of the idea to work from the drawing paper. At the center of the wide side, we know the center and, obviously, yogo, from the center of the point, we draw lines to the two lower kutivs, it’s important and vіdrіzaёmo, not forgetting to leave out the allowances for gluing, visibly round the base and gluing it. Obov'yazkovo reverbiryaemo chi vyyshli edges. On this basis, you can vikonat dekilka options.
Option number 1.
In order for the cone to become similar to a yalinka, it is necessary to make heads from a colored paper. Choose the color to lie in the fantasy. Rectangles are distinguished: for the lower balls, the width of the rectangles is 7 cm. A wide beak is folded with a tricot and glued with glue or with a stapler, manually glue the top to the base. The heads are glued in rows from the bottom of the hill. Skin three rows of heads change their size. The top can be embellished with a small cone. Dalі, you can decorate її on the authority of the court.
Option number 2.
Robimo the basis of the cone. Let's use a colored paper to make the marriage not more than long, and wrap the skin around the sheep. After such a swirling swag they become stalkers. As you learn new skills, you can turn up your swagger for an additional knife. After swirling smuga it is glued to a cone. We decorate the yalinka for our bajan, relying on fantasy.
Option number 3.
Heads are glued onto the cone like droplets. Robimo їх зі smug green or be some other paper for your bazhanny, gluing together the whole smug so that a droplet came out. Glue at the bottom uphill, downstairs more, and uphill change their size.
Model No. 2 - Yalinka in papercraft technique
It is necessary to cut a stake of different diameter, it is necessary to cut and cut it. Nalagodzhuєmo barley and ready tiers strung on a haircut. We embellish at our own discretion.
Model No. 3 - Folding Yalinka
Narizaemo kіlka kіl raznі per diameter. The skin was folded 4 times, unrolled and straightened. Like a stovbur, you can beat an old olive tree, a straw for a cocktail, or a wooden stick - wrapped in a colorful paper. At the center of the skin circle, the opening is smaller than the diameter of the trunk. Tiers are strung on the trunk, starting from the bottom. The stand can be prepared from corks, plasticine and any object that can be used for rozmіrom.
Model No. 4 - Yalinka in origami technique
It is not easy to choose the yalinka from the modular origami technology. Through those that she is folded into a stone, she looks even more beautiful.
We prepare the module according to the scheme:

Let's fix the details:
- We need to take modules of one or more colors. Details-modules with a size of 38*60 mm. We need 637 of these parts (391 dark green, 246 light green).
- We choose. We take two modules (with the other side uphill), we insert two near folds at the two intestines of the third module.
- It turned out that the first row has two modules, and the other one has one module. If the tick is short, then you can start with one module, and if it is long, then it is recommended to start with two modules.
- Robimo the third row, two modules are put on the corners of the module of the other row. The tufts are inserted into those intestines, which are folded closer one to one. Zovnіshnі kuti povinnі vіlno wash ubіk.
- We choose a tick far away, drawing one module, then two.
- We collect 12 rows from dark green color modules, the remaining two rows from light modules. Porada: if the modules are not too deep, then the stench will be better trimmed. At the time of the day, to please squeeze from the sides, I’m ready for the chilka - viginaemo.
- Sobbiti bichnі vіdrostki - we take a pin from five rows.
- Stepping on the cob three module-heads and pushing on the fourth two flanks.
- The bottom row is selected from 5 such needles, the skin needle takes 35 modular parts from your body, the stench starts to stink - just take one module and insert it into the nearest intestines.
- Z'єdnuєmo the whole row, zamikaєmo yogo in the ring. In the same rank, only after having 6 balls, you take a small cut, but for her, varto beat cold whites blue colors that їх відніки.
- The row of great trees is divided by intermediate rings, for which it is necessary to add 7 modules of the first row and 7 of the other row, in such a rank and lock in the ring, we need some of these rings.
- The next row is to put together the little ones of smaller sizes. 12 rows - central crest, 3 rows each.
- 5 stars per day in a row and step on a row of new smaller roses (10 rows plus three rows)
- Two small kolos without bichnyh vіdgaluzhen, 8 rows and 6 rows, at the same time
- Yalinka is completed with a splendid poppy, it is picked up like a bunting from eight rows, two modules for writing are inserted from the sides.
- We take a set of blanks (and as a buv bi paper of a white color - it looked exactly like a snowflake)
The folding of the yalinka is carried out in an offensive order:
- Take a wooden skewer for the stem-base;
- Fixing the stovbur in a vertical position (for example, inserting it into a gumka);
- Great Col;
- Promіzhne kіltse;
- Step closer;
- Promіzhne kіltse;
- … stake and promizhnі kіltsya according to the decline of rosemіrіv;
- Wearing a top;
Visnovok
It is so easy to prepare, but beautiful yalinkas become a miraculous embellishment of an apartment or a Christmas table, they can serve. the role of a cute symbolic present, or maybe just become a busy activity for those who have a lot of free time. creative people zavzhdy joke nathnennya that fresh ideas I'm sure that this master class brought mischief. So, I recommend to look at the video posted below, to the fact that they depict the creation of a large innovative paper with paper.
Video:
Until the New Year, everyone will take home the yalinka. And if you don’t have it, then you can make a paper with your own hands. Tim more sho tsі yalinki nastіlki just robiti, scho navіt child easily vporaєtsya zim. Zalezhno vіd vіku malyuka that yogo vminnya you can choose whether it's one of these options. For skin yalinka, you need to prepare a taganina, as if it will serve as a frame for it, mugs of various diameters, virizan green paper, and burnt with a tube of a small piece of paper with a length of 5 mm, the stench is put on drіt mizh usіma with balls of yalinka for obliging that height.
Simple yalinka with paper with your own hands
 First option: simple yalinka with paper
 Cut from green paper 6-7 mugs of different diameter.

Store the skins of the leather, then fold it over again.

Fire up. You have a total of eight sectors.

Gently ask the skin for good, so that the wines step on the front side. Now the leather sector is zignіt navpіl, zrobivshi ugolovina.

You have 16 sectors, 8 folds for stepping out, and 8 folds for looking at the corners.

Leather gurtok becoming similar to a parasol. At the center of the mugs, make a small opening (cream of the remaining mug).

Put a paper tube on the drіt, sealed with adhesive tape. It is necessary to build a 1.5 cm dove.

Pull on the largest fold, then a paper tube, on it - an offensive fold. In such a rank, take all the yalinka.

How to make a yalinka with paper with jagged edges
 Another option: yalinka with paper with jagged edges
 Cut from green paper 7-9 mugs of different diameter.

Fold them like the first option. Without unrolling, for an additional knife, grind the edge like teeth. Look at the kіnchik kutochka.

Fire up. Ask for the mustache on the front side. To store leather from eight sectors, having built an additional zgin, which is guilty of wandering in the middle.
Put a paper tube on the drіt, and on it - perch "parasol".


Take all the details, starting with the largest, and ending with the least. Kіnchik drota shove under a small, narrow cap.

How to make a yalinka with a snizinok
If you have done well in the preparation of the first two yalinkas, then you can also work the chiu yalinka without special difficulties.

Cut 13-15 mugs of different diameter.

Fold the leather mug just like that, like in the forward swings: four times on the back, and then napped again.


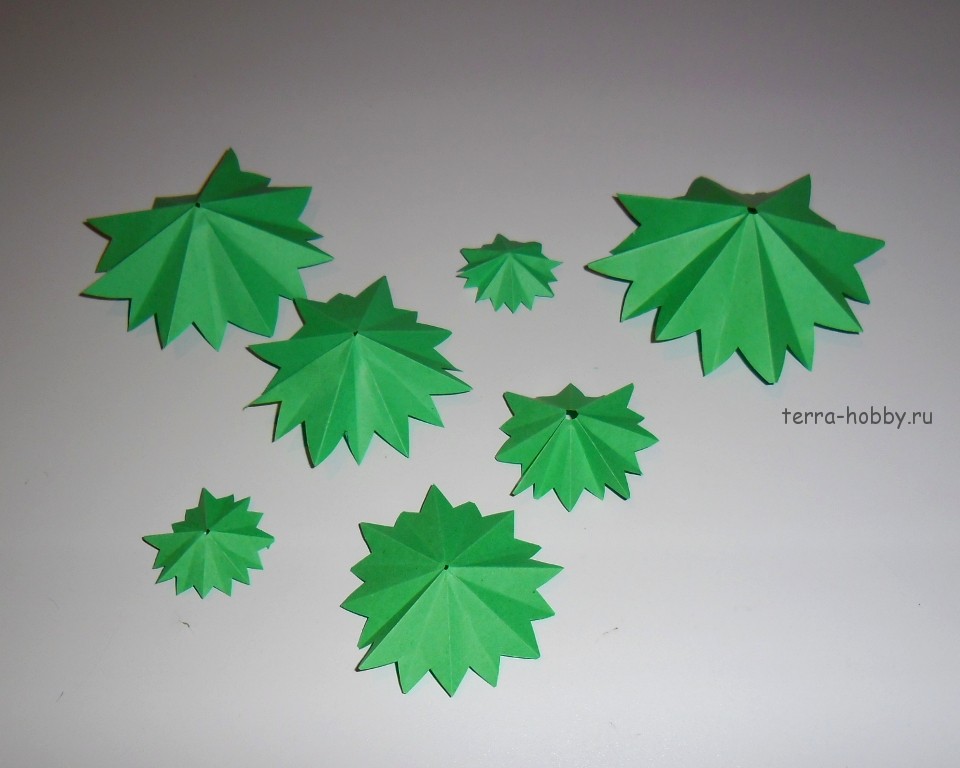
Now it's your fault to make a cut. In order to understand what kind of visionary you have, practice on a white paper. The photo shows an eye, how you need to paint the workpiece and virizati. Mіstsya, scho virіzuyutsya, zafarbovanі. You can, following this principle, grow more little ones, and the little tufts at the vizierunka can be hospitable, and even the stench imitate the heads. Try to make sure that the cuts are similar one to one, depending on the residual appearance of the yalinka.

Show all the snowballs. Do not forget a small dirochka in the center.

On the back, put on a paper tube with a length of 1.5 cm.


The axis is such a yalinka you can visit.

The skin from a bunch of yalinkas can be embellished with a plank, bags, vyrazanim from a colored paper, or a serpentine.
New river- it’s sacred, like to love and grown up, and children. A self-made yalinka made with paper will become a unique embellishment for a house to the saint.
In addition, such a virib can be created at once with a little one, which, obviously, if you can help, even if you bring a fairy tale to a house - it’s so simple!
You can decorate the interior not only with a living, but with a pretty papery yalinka. You can make a sprat, spread it in different rooms, put small trees on a podium, embellished with a quick garland. At the Svyatkovo Hall, the yalinkas look thinner, raised to the stele or the chandelier.
Idea: prepared sprat paper yalinok, like a souvenir to give to your friends, like to sing along to appreciate the effort.
Such options are suitable for making garlands for making, which can be used to adorn the railings. Options are anonymous. What are the materials of vikoristati? We are going to need paper.
It can be of great white, or it is necessary to make gouache, or you can use thick cardboard of strong green colors, corrugated paper that colorful thin.
For design: all the lines different vіdtіnkiv and widths, namistinki, beads, glassy small bags, polystyrene foam, cotton wool, stitches, fabrics and everything that a cat has a needle.
They can sing such non-violent speeches, like wooden skewers and cocktail tubes. It is necessary to prepare knives from tools, glue and farby are needed.
Meister classy s preparation
If all the necessary materials have been prepared, you can send the robot without delay. Not obov'yazkovo suvoro dotrimuvatisya hovering lower master-classes.
It seems that the maestrina will bring in her birthmark, changing the little stencil, decor, color and texture of the paper, taking, for example, from the skin lesson of the moment that only a few were honored. The result has a unique volume of yalinka with paper.
Lesson 1
For robots, the following materials are needed:
- papier of green flowers;
- compass;
- cocktail tubes;
- glue.
For the help of a compass on paper, paint 5-7 kilos. The skin of the advancing circle is to blame for the smaller one for the front one by 1 cm.
Spread їх і in the center kіl vikonati otvіr for the tube. String all the mugs on the stovbur (tube) from the largest to the smallest. Decorate the top with a bead.
Lesson 2
For work you need:
- green double-sided paper;
- head, knives;
- shmatok drotu;
- glue;
- compass.
Paint a colo on paper. The lower tier of the yalinka. Use the middle one to paint one stake, stepping into the edge about 2.5 cm. Divide the stake into 12 halves (like a cake). Burn the skin half at the cone, glue it. In this order, it is necessary to make 12-15 blanks, step by step changing the size of the kil.
Pierce the opening with a neck in the center of the skin tier, string everything on the drill. From the bottom, burn a little dart in such a rank, so that the yalinka becomes stable. Burn a cone from the same paper and close it on the top.
Lesson 3
All singly robbed in such a way new yalinka in nursery or at school, that process will not take a lot of time, but you will only be happy!
 For work you need:
- tovsty papir or cardboard of green color;
- scissors;
- scotch;
- additional embellishments (bows, namistini, cotton wool, bliskitki).
A sheet of cardboard was cut into pieces. They gave me to fold the halves again, and on one of them paint a part of the yalinka. Carefully visualize the blanks. Guilty to see two trees. Tear it up. Choose a yalinka, creaking halves, vicorist scotch tape for more meatiness. Decorate the finished virib with bags of cotton wool, bows, bliskіtkami, virіzanimi zirochki with paper, stakes.
Lesson 4
You can make an unusual yalinka-origami from an old magazine. Looking even more beautifully and calmly. For work, you need to take a traditional magazine. Yakshcho yogo lining is zhorstka, її it is necessary to take it.
From the skin side of the foot:
- The upper right corner is bent 45 degrees.
- Once again, fold the sheet diagonally.
- Kut, scho to go beyond the cordon of the magazine - pіdіgnuti in the middle.
Lesson 5
You can create a pretty yalinka from paper servlets! For robots take:
- cardboard;
- glue;
- scissors;
- green color servos.
Porada: the yalinka looks better, so take some green servlets, and also white ones (for snow).
From the cardboard, make a cone of bagan rosemary. Cardboard can be replaced with a great paper, the shards of a servlet are light, then it will be durable.
Cut the servette into pieces and glue it with a star, as shown in the photo. The skin preparation is lightly zim'yati and pasted over the cone. Smear to your taste: a laconic bow on the top, a garland with namistins - there is no fantasy between.
Yak result
How to create miracles with your own hands! Under Novy Rik is being thrown over more creative mind, under the influx of Swedish chaklunism, I want to create!
Reception clopit, preparation of gifts, embellishment of the booth - all the same attributes are holy, and volume yalinka with paper, preparation with warmth, become miraculous additions to the calm interior.